Showing posts with label BAKED sunday mornings. Show all posts

Tuesday, July 5, 2011

BAKED Sunday Mornings: Blackberry Pie

Happy Independence Day everyone! Don't let the pictures fool you- this Baked recipe is for Blackberry pie. Since I don't like blackberries, I used strawberries. I also halved the recipe. This was a really easy pie recipe to make. I love pie dough recipes that come together in the food processor- so simple! Making the fruit filling was also really straightforward and didn't take a long time.


I brought this pie over to my mom's house where we're busy getting ready for a garage sale next weekend. When making this pie, I forgot that I'm not a big fan of cooked strawberry desserts, and so I wasn't a huge fan of this pie. I did love the simplicity of the recipe and now I wonder if I would have liked it better if I had used blackberries.


To see the recipe and how everyone else's pies turned out, go to Baked Sunday Mornings

Monday, June 6, 2011

BAKED Sunday Mornings: Orange Creamsicle Tart


Oops, I'm a day late posting this! I have a very good excuse though- I was super busy yesterday baking and cooking for and going to a family reunion at my mom's house. I was up really early and running around my apartment trying to get everything together. I made this tart as one of the desserts for the family reunion. It had a lot of steps but was really very easy to make! I made the tart dough and the orange creamsicle curd on Friday and refrigerated both for a few days. I baked the tart dough yesterday and whipped up the orange creamsicle curd as directed in the recipe. I also made the whipped cream (using a mixer, because I just didn't have time to do it by hand). I filled the tart with the orange creamsicle curd and then tried to leave to go to my mom's house. I put the tart in a box because I saw that it was pretty full. Well, luckily I had extra filling that I brought with me, because a lot of the filling spilled out of the tart on the ride to my mom's!


So, when I got to my mom's, I fixed the filling problem and covered it with the whipped cream topping. It refrigerated for another few hours until it was time for dessert. I'd say that this dessert was pretty well received. I loved it and so did my mom, who is a huge fan of orange creamsicles!

Speaking of orange creams, this is the soda I found to use for the tart:


I had some left over and tasted it- it was good, even though I'm not a soda drinker!

The only complaint about the tart was that the tart crust was very hard- difficult to cut! I think that was my fault for not rolling out the dough thin enough- this is not the first time I've had this problem!

For the recipe and to see how everyone else's recipes turned out, head over to Baked Sunday Mornings

Sunday, May 22, 2011

BAKED Sunday Mornings: Cowboy Cookies


This week's recipe is for cowboy cookies! I have to say that I've always been a fan of chocolate chip cookies that add in all different kinds of fun flavors. So it was surprising to me that I wasn't a huge fan of the compost cookies from Momofuku Milk Bar. But anyway, I was excited to make these cookies when I saw that crushed pretzels were one of the ingredients! I love salty & sweet together. This recipe also called for espresso powder and oats, in addition to chocolate chunks. I used chocolate chips because that's what I had. I probably should have left out the espresso powder because I'm not a huge fan of coffee flavor, but everyone else who tried these cookies loved them! I brought them to work and my co-workers gobbled them up. Even my mom liked these cookies and she usually doesn't like many sweets.


These cookies were really easy to make. As usual, I made a half batch. One difference was that they called for cool butter instead of room temperature butter. This was easy for me because I usually don't leave enough time for my butter to come to room temperature anyway when I'm baking. The recipe also called for chilling the dough for 4 hours in the refrigerator but I have to confess I got impatient and only chilled them for an hour and a half. I don't know how much of a difference that made though. These are a nice and easy cookie to make and the somewhat unusual combination of ingredients is something that most people enjoyed!

To see the recipe and how everyone else's cookies came out, head on over to Baked Sunday Mornings.

Enjoy!

Sunday, May 8, 2011

BAKED Sunday Mornings: Tomato Soup Cupcakes


Wow, when I saw that this week's recipe was for tomato soup cupcakes, I didn't know what to think. Tomato soup, in a cupcake? I love my cupcakes, but I wasn't sure about this one. I've made cupcakes w/bacon before (not on the blog) and those came out well, so I figured that a cupcake with an unusual ingredient could have a chance at being tasty.

These cupcakes were really easy to make with my stand mixer. I made these cupcakes in a mini-cupcake pan and I also made 1/4 the recipe because I didn't know what I'd do with 2 dozen cupcakes. As it was, 1/4 the recipe made 16 mini cupcakes. Since I made mini cupcakes, I baked them for about 16 minutes. The frosting was also super easy to put together and I went for a rustic look by using my offset spatula to frost the cupcakes. The cupcakes are a very light red and you can't really taste the tomato soup part of it. It really tastes just like a spice cupcake, and I was pleasantly surprised!


Happy Mother's Day to all the mother's out there!

To find the recipe and read how everyone else's cupcakes turned out, head on over to Baked Sunday Mornings. Enjoy!

Sunday, April 24, 2011

BAKED Sunday Mornings: New York Style Crumb Cake


Happy Easter to everyone who celebrates! What is everyone cooking/eating to celebrate today? This New York style crumb cake had a lot to live up to, as my parents are both originally from New York and I have eaten crumb cake many times growing up. This cake came out beautifully!

We haven't actually eaten this cake yet, as it will be our Easter dessert. My family is going to my sister's house today- we're having ham, pot roast, mashed potatoes and asparagus. My mom and sister are very excited for this crumb cake- I hope they can last until after dinner to cut into it!

This cake was very easy to make. I made a half-batch since we're not expecting too many people for Easter. I baked it in an 8-inch square pan and that seemed to work out well. The cake batter comes together easily and the crumb topping was even easier to put together! It was important to follow the recipe directions to let the crumb topping "rest" for awhile before putting it on top of the cake and baking it. I let mine rest for about half an hour and I could tell the difference in how it was a little dryer and came together in big clumps in my hand. The recipe states that big crumbs are integral to this recipe and I certainly had many big crumbs on top! Some of my crumbs came out a little smaller, but I don't think that's too much of a problem.

To hear how everyone else's cakes turned out, head on over to Baked Sunday Mornings!


Enjoy : )

Sunday, April 10, 2011

BAKED Sunday Mornings: Carrot-Coconut Scones with Citrus Glaze


I've long wanted to bake something with carrot. I've never made carrot cake or carrot cupcakes because the idea of having to shred carrots intimidated me and I just never got around to trying a recipe. I'm so glad that Baked Sunday Mornings challenged me to make another recipe that I probably would never have tried. This was a fairly easy scone recipe to make. I didn't have to shred any carrots because this recipe calls for microwaving the carrot in orange juice and then pureeing it before adding it to the scone recipe. The recipe also called for using your fingers to rub in the butter into the dry ingredients. I usually use my pastry cutter for doing this but this time I decided to follow the directions and use my fingers. It seemed to get the job done quicker, although my hands were a lot messier! You then add in the wet ingredients and again use your hands to knead it all together. My dough seemed pretty sticky, but it was workable.


The recipe said to cut the dough into 6 or 8 pieces. I cut it into 8 pieces and froze 4 of them unbaked to bake at a later time. These scones came out so huge that I probably could have cut them in half again before baking! After cooling, you mix up the citrus glaze. The recipe called for powdered sugar, orange and lemon juice. I used only orange juice, because that's what I had. The scones were good but seemed very sweet. I definitely couldn't eat a whole one at once. The recipe used sweetened coconut but if I made them again I might use unsweetened coconut to see if that cut the sweetness at all.


I brought these to work and my co-workers shared them and seemed to like them!

To read how everyone else's scones came out and to see the recipe, head on over to Baked Sunday Mornings. Enjoy!

Sunday, March 27, 2011

BAKED Sunday Mornings: Malted Crisp Tart


Hi everyone! I can't believe that I had to miss the last two recipes in Baked Sunday Mornings. With all the reviews I read of the recipe for Salt-n-Pepper Sandwich cookies, I definitely want to make those soon! I was so glad I was able to bake the tart for this morning's recipe. I made it a few days ago after work, and even though there are many steps, it really didn't take that long. The tart dough came together easily in the food processor. The caramelized rice krispies were easy to make and tasted delicious on their own. The chocolate ganache also came together easily and even the malted pastry cream wasn't too many steps. This is definitely a recipe that requires a lot of bowls, measuring cups and spoons. The recipe called for malted powder, which I wasn't sure where to find. I went to my local supermarket and asked someone there if they had malted milk powder and they didn't have any in the baking aisle. I was told to go look in the coffee aisle where the Ovaltine is. I bought regular malted Ovaltine powder and that seemed to be the right thing for this recipe. I know malted milk powder can be purchased online, but I didn't plan ahead enough for that.


After you make the tart dough and press it into the tart pan, it gets put in the freezer while the oven heats up. Once the tart dough is baked and cooled, you spread the chocolate malted ganache over the top and then press in the caramelized rice krispies and some crushed Whoppers.


The whole tart then goes into the refrigerator while the pastry cream is made. After the pastry cream is made and cooled in the refrigerator, you spread that on top of the tart and then top it with more caramelized rice krispies and broken Whoppers.


I think the tart looked really pretty once it was done! I had a lot of difficulty cutting the tart, so I think that I made my tart dough too thick (which the recipe warns against...) and I thought this tart was really sweet. I brought it to work for my co-workers and they loved it, so I think it's all just a matter of taste.  My favorite part of this tart was probably the caramelized rice krispies!

To read how everyone else made out with this recipe and to find the recipe, head on over to Baked Sunday Mornings.

Sunday, February 13, 2011

BAKED Sunday Mornings: Red Velvet Whoopie Pies


Red Velvet...who doesn't love red velvet? The best cupcake I ever had was a red velvet cupcake. This whoopie pie is very good. The cream cheese frosting goes perfect with the red velvet whoopies. I like that the whoopie pies only have a little bit of red food color in it so that they're a hint of red but not bright red. This recipe is pretty easy to make. I halved the recipe like I usually do. You cream the butter and add the sugars, then add the dry ingredients alternating with the wet ingredients. 15 minutes in the refrigerator while the oven preheats and then you pop these in the oven. Mine took 12 minutes in the oven. I tried to make them smaller but they came out pretty big once baked and with half a recipe, I made 10 cookies, resulting in 5 whoopie pies. I would love if I had one of those special whoopie pie pans to make my whoopies all the same size, but I was able to match these up pretty well. I gave these out to my friends and they liked them. A perfect treat for Valentine's Day (or any time of the year, in my opinion!)


For the recipe, and to see how the other bakers whoopies came out, head on over to  Baked Sunday Mornings. Enjoy!

Sunday, January 30, 2011

BAKED Sunday Mornings: Double Chocolate Loaf


Welcome to another installment of Baked Sunday Mornings! I'm sorry I haven't been baking/posting very much- I've been busy with work and then all the snow we've been having here hasn't put me in the baking mood. I was excited to try the double chocolate loaf as it seemed like an easy recipe and I love chocolate and peanut butter together. This is a pretty basic recipe to make- you pretty much just stir everything together and it doesn't take very long. I didn't make the peanut butter cream cheese spread that went along with the recipe. Instead, I put in a combination of chocolate chips and peanut butter chips so that the loaf would have the peanut butter taste. I also halved the recipe and made them in two mini loaf pans.


I also sprinkled some extra peanut butter and chocolate chips on top of the loaf before baking for some extra peanut butter taste. In the mini loaf pans, the loafs baked for about 40 minutes before they were done. These tasted nice and chocolatey!

If you want to see how everyone else's chocolate loaves turned out, or you want the recipe, head on over to Baked Sunday Mornings. Enjoy!

Sunday, January 16, 2011

BAKED Sunday Mornings: Farmstand Buttermilk Doughnuts


Welcome to another Baked Sunday Mornings! I have only ever made donuts one other time- pumpkin donuts a few years ago around Halloween. They tasted good but they looked like big globs of fried dough. I also seem to remember that they were yeast donuts. I liked that these donuts were not yeast donuts. They came together so easily and I had all the ingredients on hand already. I halved the recipe and I'm glad I did because it made 8 full size donuts and I don't know how I'll eat them all! There was a note on the recipe that you can use these donuts in a bread pudding, so I think that I might do that with my leftovers!

Dry ingredients

First you whisk together all of the dry ingredients. I loved the smell of the nutmeg and cinnamon! I also used buttermilk powder because I find that so much easier to keep on hand because it lasts a lot longer than buttermilk. I put the buttermilk powder in with the dry ingredients and then added the water to the wet ingredients, which I didn't get a picture of.


The dough was sticky when I stirred it all together and I had to add a bit of flour when I was spreading it out on my cutting board because at first the dough stuck to the board and fell apart when I tried to cut out a donut.


I used a glass to cut out my donuts because I don't have a round cookie or dough cutter. I also used a small flower shaped fondant cutter to cut out the donut holes and it worked out perfectly! By the way, in the picture above you can also see the stack of my beautiful flower measuring cups from Anthropologie that I mentioned in my previous post.


After adding some more flour and kneading it into the dough lightly, my donuts cut out beautifully! After I chilled them for awhile in the refrigerator, I fried them up.


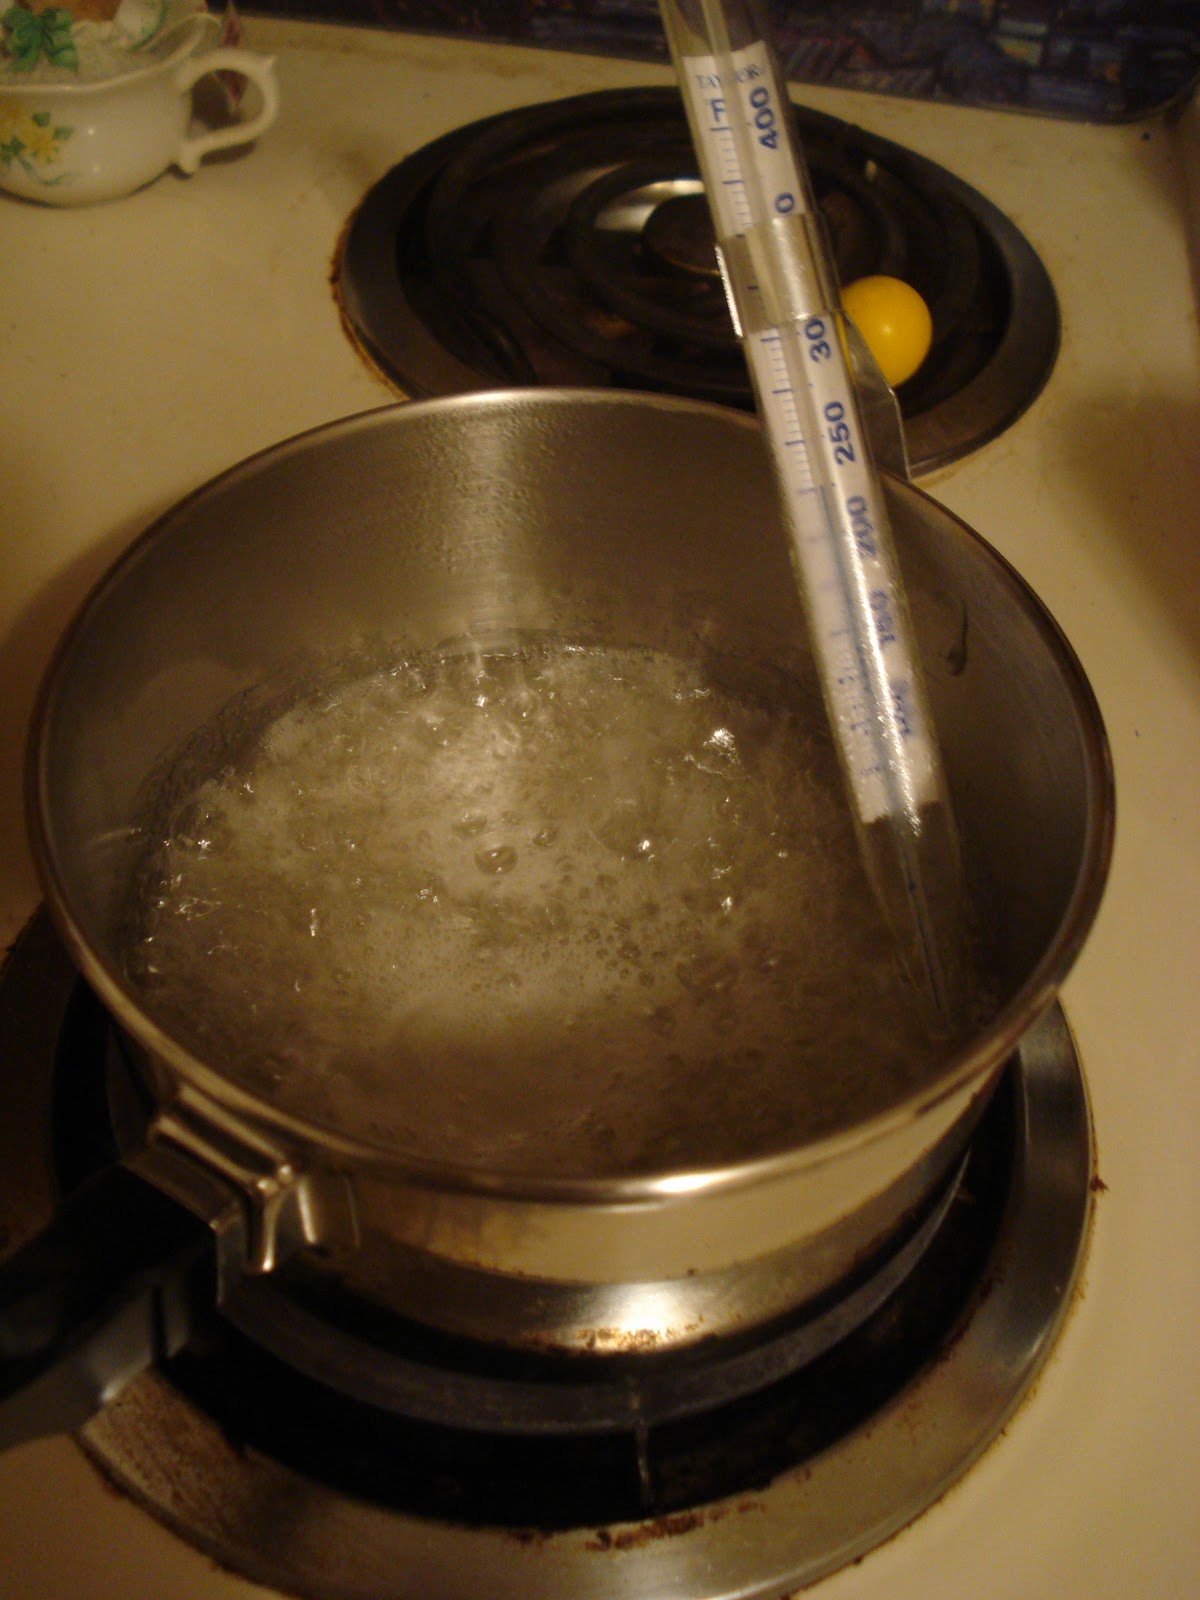
I paid careful attention to the color of the donuts to make sure that they didn't burn, as the recipe notes that they can burn quickly. They fried rather quickly and were probably done on both sides in under two minutes.


The recipe gives three different options for toppings- chocolate glaze, vanilla glaze and cinnamon sugar. The recipe says that farmstand donuts are usually sold with a cinnamon sugar topping and that seemed easy to me, so that's what I did for most of the donuts.


I also made a chocolate glaze for some of the donuts and also used some chocolate sprinkles. The three chocolate glazed donuts above I actually baked in the oven at 375 F for 12 minutes because I wanted to see how baked donuts would taste compared to the fried donuts. They taste pretty good to me but I definitely like the fried ones, which of course are even more unhealthy!


These donuts were not as intimidating to make as I first thought and the flavor was delicious! Head on over to Baked Sunday Mornings for the recipe and to see how the other member's donuts turned out!


Sunday, January 2, 2011

BAKED Sunday Mornings: Almond Joy Tart


Wow, where have I been? I can't believe I haven't baked in so long- I baked so much for Christmas and there were so many leftover cookies that I was trying to eat instead of baking something new. I also ran out of butter but finally got to the supermarket yesterday. I hope everyone had a Merry Christmas! Happy New Year 2011 too : ). I know that 2011 will be an awesome year and one of my goals is to bake and cook more and to continue to blog what happens in my kitchen!

I wasn't sure if I was going to find the time to bake this almond joy tart, but boy am I glad I made the time! I have always loved the almond joy candy bars. This tart tastes divine and really reminds me of the candy bar. Once again, I halved the recipe and since I didn't have any mini tart pans, I made a free-form tart on a cookie sheet. As usual, my presentation needs to be worked on, as you can see from the pictures, but I kind of like the rustic look. I think my chocolate glaze didn't cover as well because there was so much coconut cream filling on the tart. For this tart, I followed the recipe pretty closely. I used almonds for the tart crust and for on top of the tart that were already roasted and that were maple coconut glazed. I used Malibu coconut flavored rum for a little extra coconut flavor. I also used only milk chocolate because I didn't have any dark chocolate and milk chocolate is my favorite anyway. I used unsweetened shredded coconut that I found at Whole Foods and I'm really glad I used that (like the recipe called for) and not the easier to find sweetened shredded coconut because I think that would have made it too sweet and the unsweetened coconut really reminds me of what is in an almond joy candy bar.

I was surprised at how easy this tart was to make, since it included several steps. You do have to be prepared in advance to make this, because the tart dough and the white chocolate mixture require substantial chilling time. I made the tart dough and the white chocolate mixture yesterday and refrigerated them until this morning. The tart dough began to crumble a little when I was rolling it out, but I just gathered it together in a ball again, re-floured and rolled it out and it came out perfect.


My free-form tart, in the oven.


The white chocolate coconut cream


Milk chocolate glaze


The almonds I used for the tart dough


Delicious!

Be sure to head over to Baked Sunday Mornings for the recipe and to see what the other members thought of this recipe!

Sunday, December 19, 2010

BAKED Sunday Mornings: Monkey Bubble Bread


Here we are at the third recipe in BAKED Sunday Mornings. Monkey Bubble Bread. I had made this years ago, using a different recipe that called for frozen bread dough. This time, the recipes calls for homemade yeast dough, which I was a little nervous about. I have no trouble making pizza dough from scratch- it always comes out great! However, I've usually had trouble making other yeast breads, like cinnamon rolls. The dough never seems to rise for me. I don't know why this happens. I was nervous it would happen this time, and it did- the dough never seemed to double in size, even though I let it rise in a warm place for longer than the time indicated in the recipe. I went ahead and continued to make the recipe, hoping for the best. As you can see in the picture above, I halved the recipe and made it in mini-loaf pans instead of a bundt pan. It smelled so good while baking in the oven- lots of butter, brown sugar and cinnamon! After taking the loaf pans out of the oven, I let them cool for a few minutes and then turned them out onto a plate.


Since I didn't use a bundt pan, my loaves fell apart a little bit, but still looked pretty good. However, I could tell as soon as I tasted one that there was something off. The dough was too dense, because it hadn't risen properly. Does anyone know what I may have done wrong? I know the recipe said to be very careful not to heat the milk up too much because that would kill the yeast. I didn't think my milk was too hot. Next time I make this recipe, I might just use room temperature milk and not heat it up at all. The Baked recipe is so well written and I do love monkey bread though, so I'm going to try this again!

If you want to see the recipe and read how the other members' recipes turned out, head on over to BAKED Sunday Mornings


Sunday, December 5, 2010

BAKED Sunday Mornings: Sweet & Salty Brownies


Apologies for the poor picture. This is the second recipe chosen for BAKED Sunday Mornings! I was so excited to try this recipe because I tried the sweet & salty brownie when I visited Baked in Brooklyn last year. I'm also a sucker for brownies and caramel, so this seemed like the perfect combination. The directions for making the caramel were so easy and it came out perfectly! I've never had such good luck making caramel! I halved the recipe for the caramel and for the brownies and used an 8 inch square pan to bake them in. The brownie batter also came together easily in 1 bowl. I used milk chocolate because I didn't have any dark chocolate, but I think next time, I'd use dark chocolate like the recipe asks for. I used all the caramel that was made, although I think I used too much because a side note on the recipe says to be careful not to use too much because it could seep out and burn during baking. The caramel on mine didn't burn, but the brownies were really hard to cut and get out of the pan in one piece, even after I refrigerated the brownies for awhile. I thought for sure when the time was up that the brownies wouldn't be done, but my knife was clear after I pulled it out of the center of the brownies. The caramel layer just makes the middle of the brownies a very fudgy texture. I loved the fleur de sel and coarse sugar on top of the brownies!

 Watching closely until the thermometer gets to 350 degrees

The finished caramel


I was unable to get a picture of the brownies sliced and out of the pan, so here's another picture of the finished product. I can't wait to try the other recipes in Baked Explorations!

Go here for the brownie recipe and to see how the other participant's recipes came out. 

Sunday, November 21, 2010

BAKED Sunday Mornings: Nutella Scones

Hello, this is the first recipe chosen from Baked Explorations for the BAKED Sunday Mornings baking group. This is the first baking group I've joined and I'm excited! I went to BAKED in Brooklyn once and I loved it. The whole cookbook looks amazing and I'm excited to try out recipes that I usually wouldn't, either because an ingredient doesn't appeal to me or because it looks intimidating. Now, with the baking group, I'll have to try new things, and I'm pretty sure I'll end up liking it all!

Unfortunately, I didn't have any hazelnuts to include in the recipe. I first made these scones a month or so ago and didn't have hazelnuts then either, and the recipe still turns out amazing! I love nutella (who doesn't?) and the flavor really comes through on this recipe!

This recipe is so easy to make, it really took me about 10 minutes to get together. I made a half batch because I didn't want any to go to waste (although I probably could have eaten almost a whole batch by myself!)
This is before I cut in the butter

The dough all patted out and spread with Nutella (did you notice my awesome Starry Night cutting board??)


The scones out of the oven and freshly drizzled. Unfortunately, my drizzling skills leave something to be desired...Oh well, I'll just have to practice!

I hope you enjoy this recipe. Head on over to bakedsundaymornings to see how everyone else's turned out and to get the recipe!